
Creating Back to School Magic
Sprinkle a Little Magic: DIY Ready Confetti for Back-to-School Cheer
If the words “back to school” make your clients (or your own kids) feel a mix of excitement and nervous butterflies, we’ve got just the thing: a pinch of sparkle, a dash of encouragement, and a whole lot of cute. Enter Ready Confetti—the easiest, most magical DIY craft you didn’t know you needed.
Whether you're a photographer looking to surprise your clients with a thoughtful back-to-school treat, or a parent wanting to make the first day a little extra special, this confetti does the trick. It’s simple, affordable, and let’s be honest—who wouldn’t want a sprinkle of good luck on their first day? We've put together everything you need: a step-by-step tutorial, a free customizable tag you can print, and (of course) an Amazon list so you can skip the craft store chaos.
First Gather Supplies
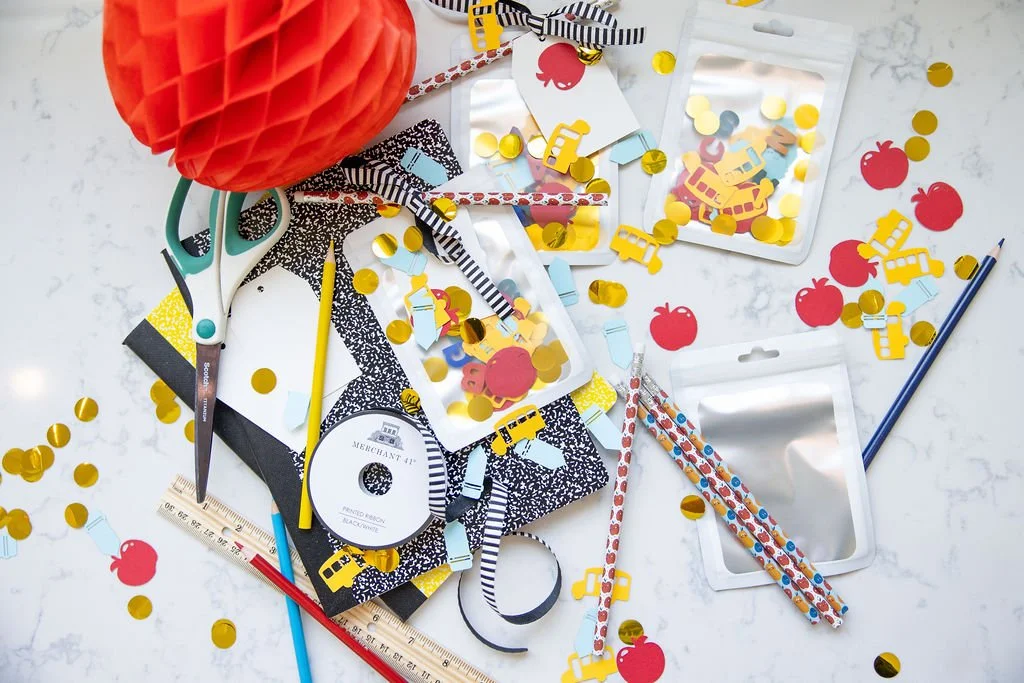
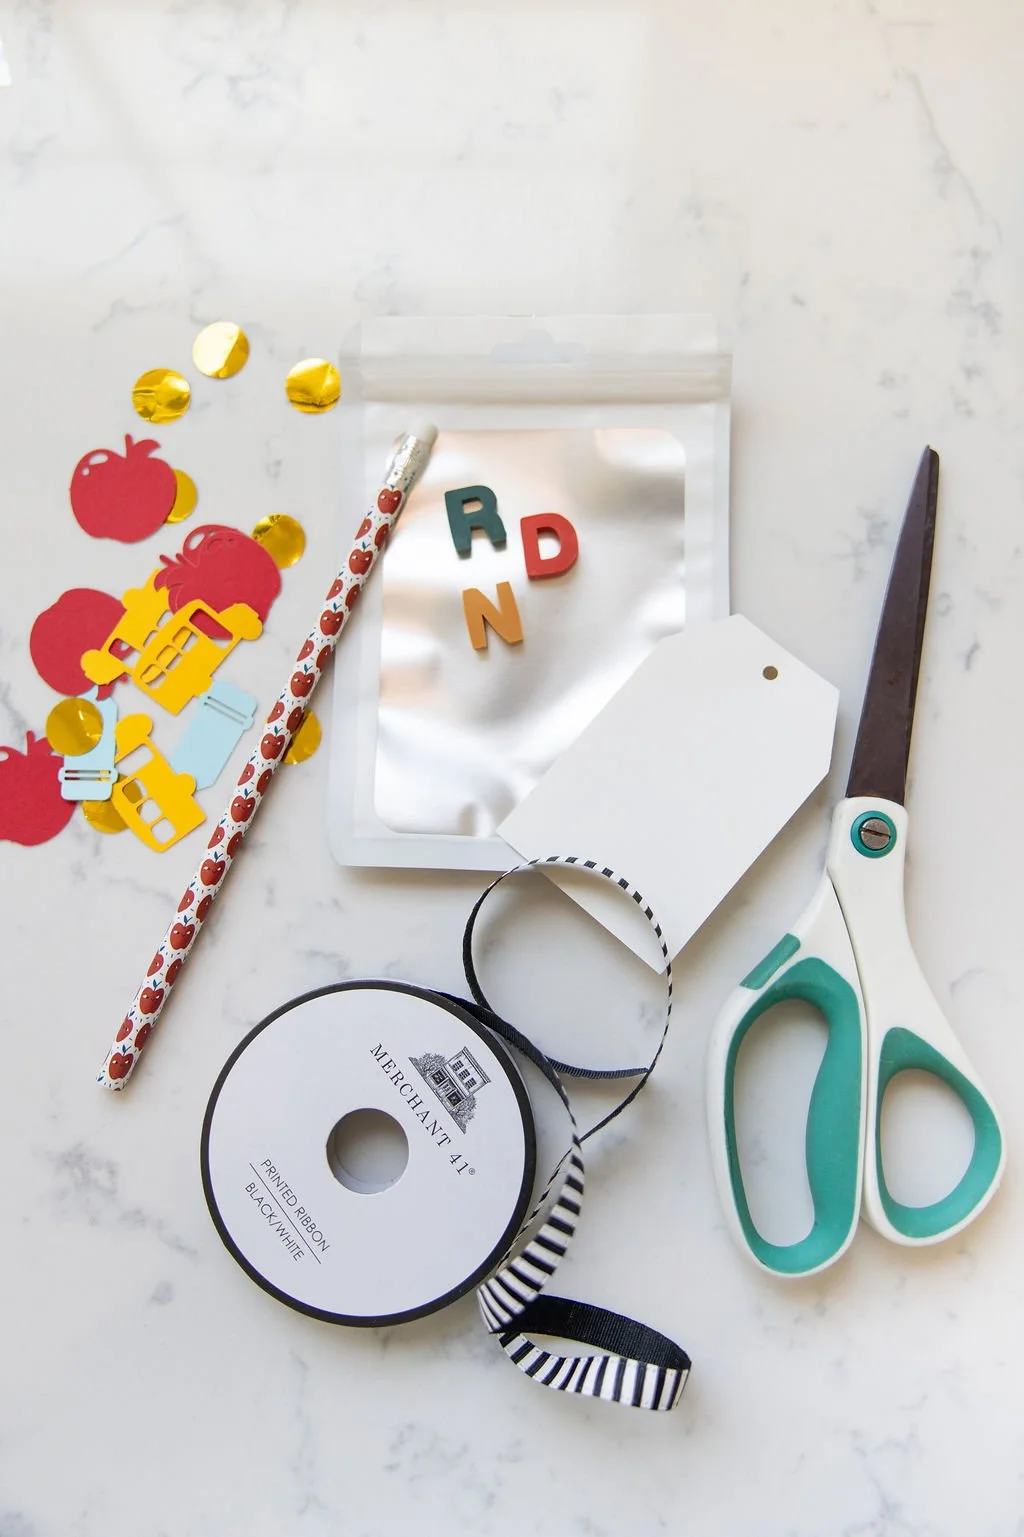
Making sure we have all our supplies together is the most important step and luckily, there isn’t much to create this easy and memorable craft. Whats nice about this “ready confetti” is you can customize the colors and style of the confetti or add in some extras like paper clips, little erasers, or small school supplies to make it more fun! I would suggest doing larger pieces of confetti vs glitter for the mess factor though. Chunky confetti is MUCH easier to clean up! Here is the list:
Confetti. I used two kinds to mix together.
Plastic bags. I preferred the mylar bags that had a zipper on top.
Scissors
Decorative Ribbon
Printer
Small alphabet erasers (optional)
Pencils to tie on (optional)
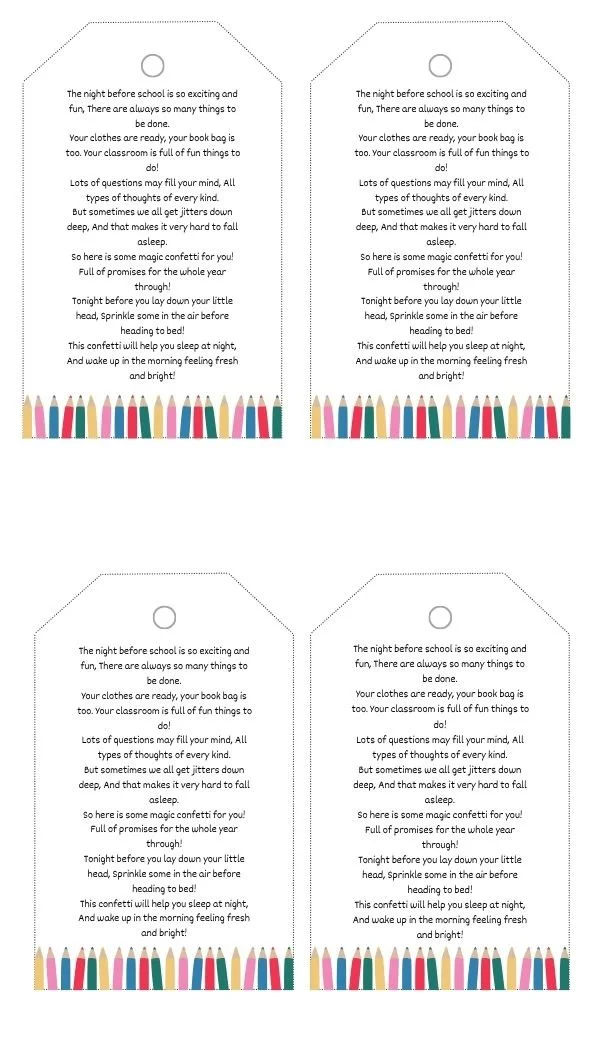
Lets print the custom tags
I already made this so you can print it as a tag for you bag. You can use regular printer paper or a card-stock paper for a thicker and more durable tag. Below is a photo of what it looks like but follow the link HERE to canva for the free PDF to print. Don’t be afraid to write a sweet note on the back to the student from you!
Putting it all together
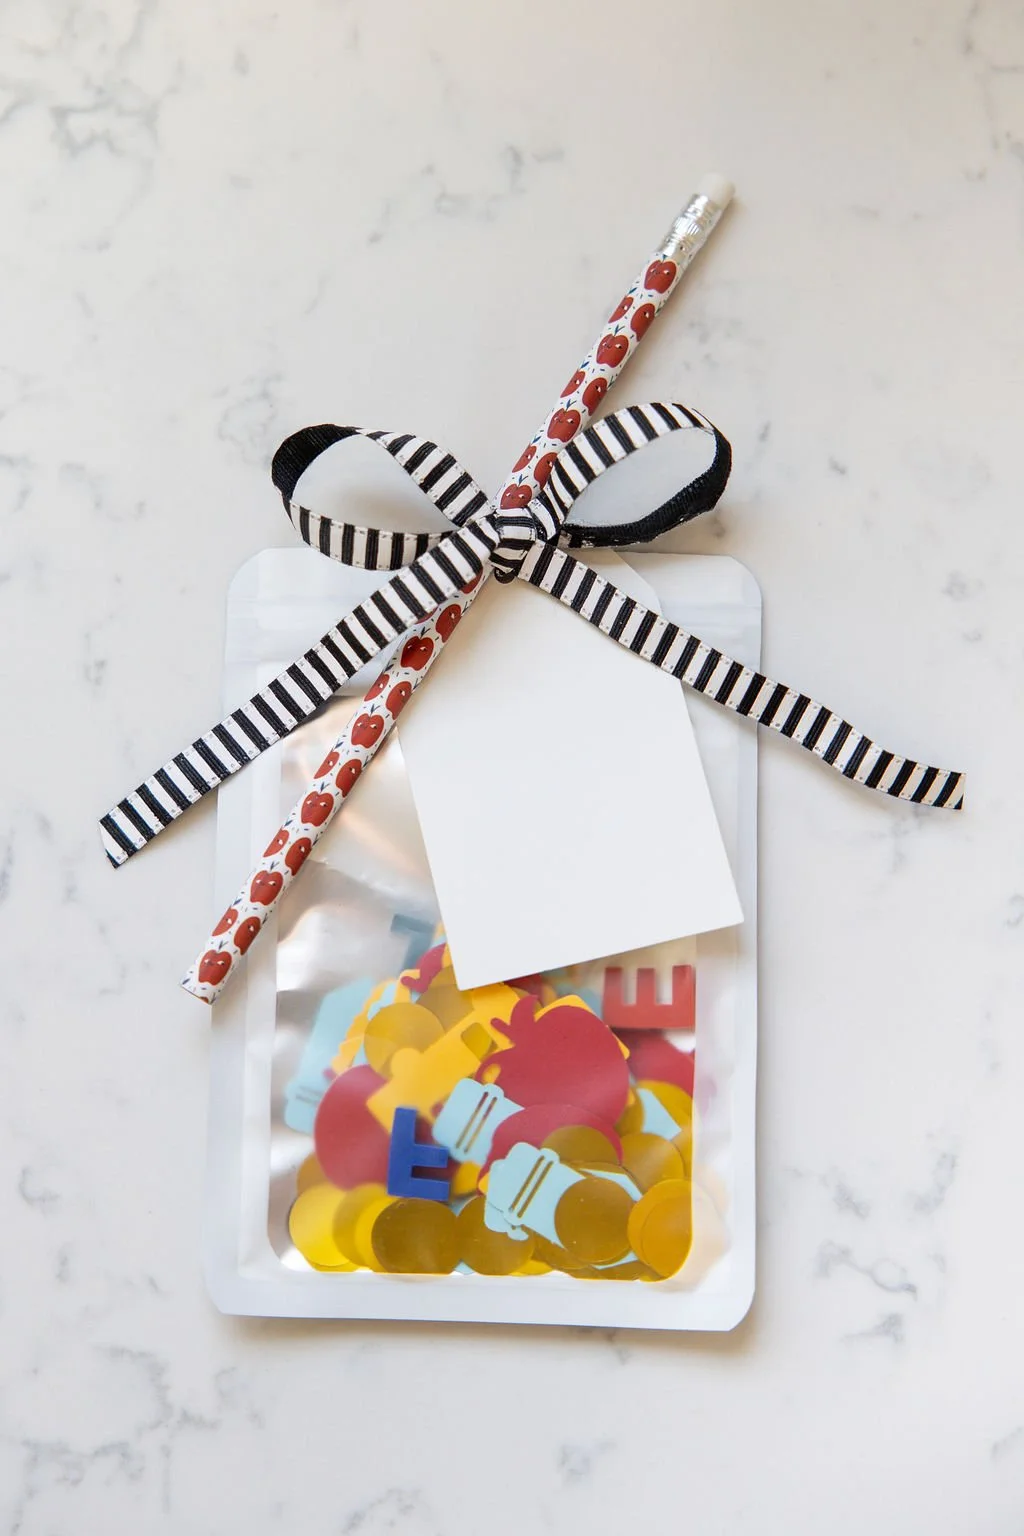
This is the easiest DIY!
First, open your little mylar bag. Fill it up halfway with your choice of glitter, and any extra fun items you want in there. I did half confetti and then about 6 mini erasers. Second, make sure its zipped nice and top at the top so you don’t have loose confetti flying around. Next, cut about 8-12 inches of a decorative ribbon to tie your printed tag at the top. I also tied an extra pencil at the top in the ribbon for a fun touch but that is optional too!
Whether you’re gifting these to your photography clients or tucking them into your own kiddo’s backpack, Ready Confetti is a small gesture that makes a big impact. It’s simple to assemble, budget-friendly, and guaranteed to deliver smiles (and maybe a few happy tears). So go ahead—spread a little sparkle, start the school year on a sweet note, and give the kind of thoughtful touch that reminds people just how much you care.