
Back to School Treat Bags
Let’s be honest—back-to-school season sneaks up on us faster than a toddler with a Sharpie. But for photographers, it’s also the perfect opportunity to show a little love to your clients and stay top of mind as the fall busy season kicks off.
We wanted to create something fun, thoughtful, and actually doable—because gifting shouldn’t blow your cost-of-doing-business calculator out of the water. Enter: our customizable, affordable, and downright adorable Back-to-School Treat Bags.
Whether your clients have preschoolers, picky eaters, or gluten-free snackers, these gift bags can be easily tailored to fit any age or dietary need. Cookies? Classic. Goldfish? Crowd-pleaser. Tiny toys? Always a hit. We’ve even curated an Amazon list so you can grab everything—including the cute tags—without spiraling into a 47-tab shopping marathon.
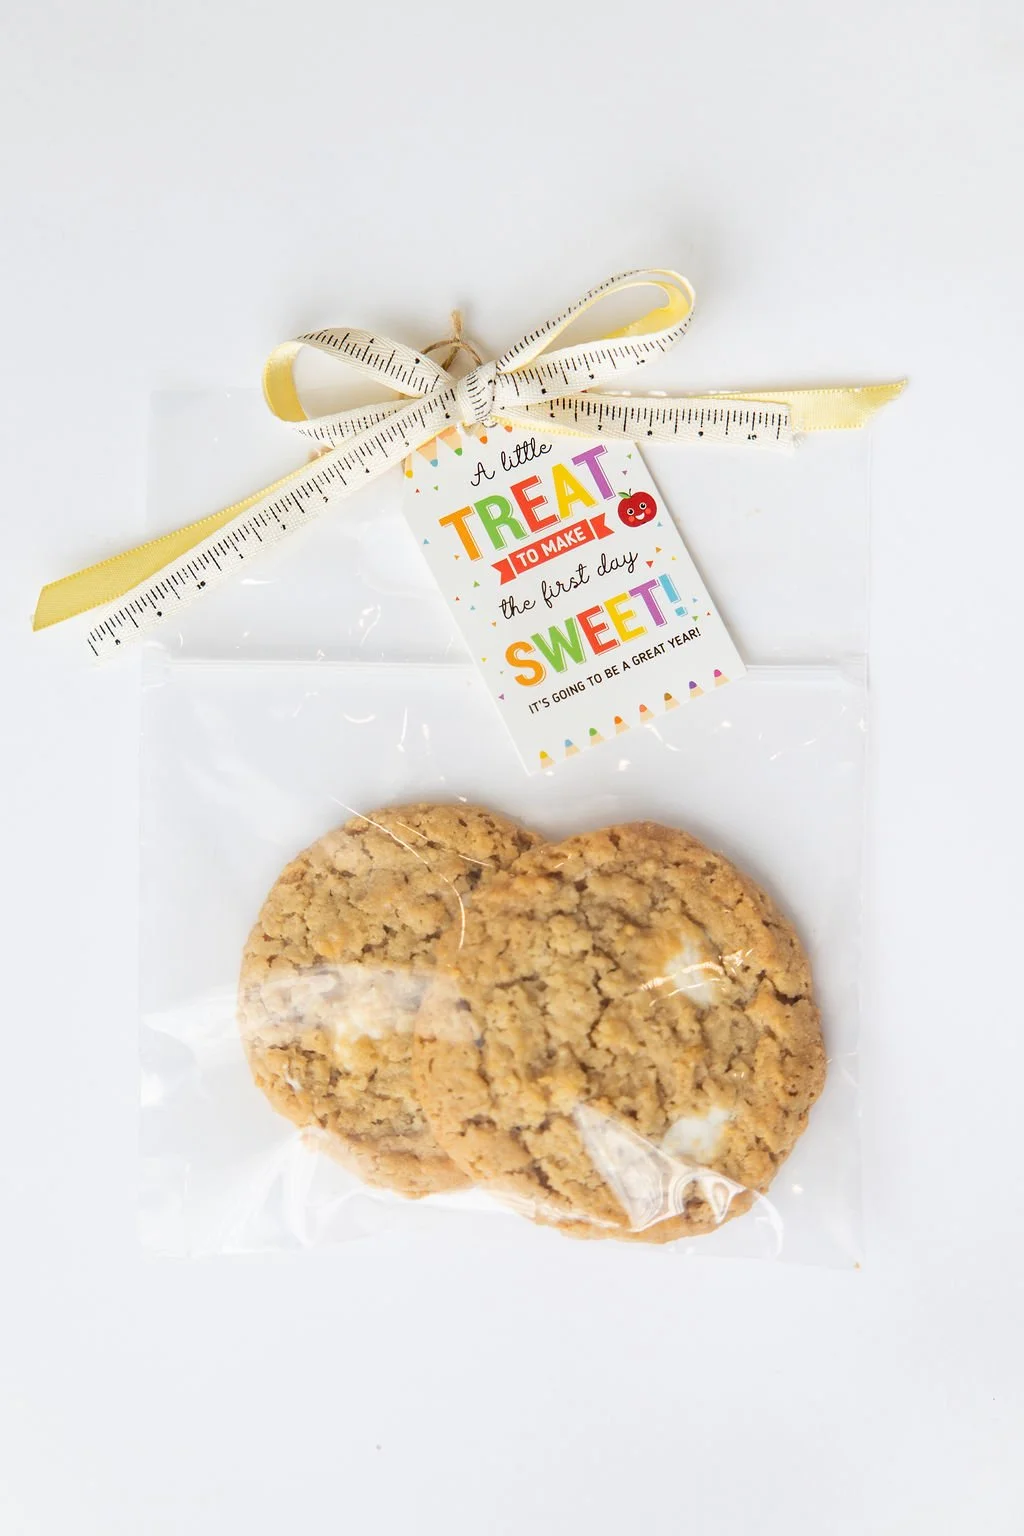
Completed treat bag with two large cookies. Can add any items inside!
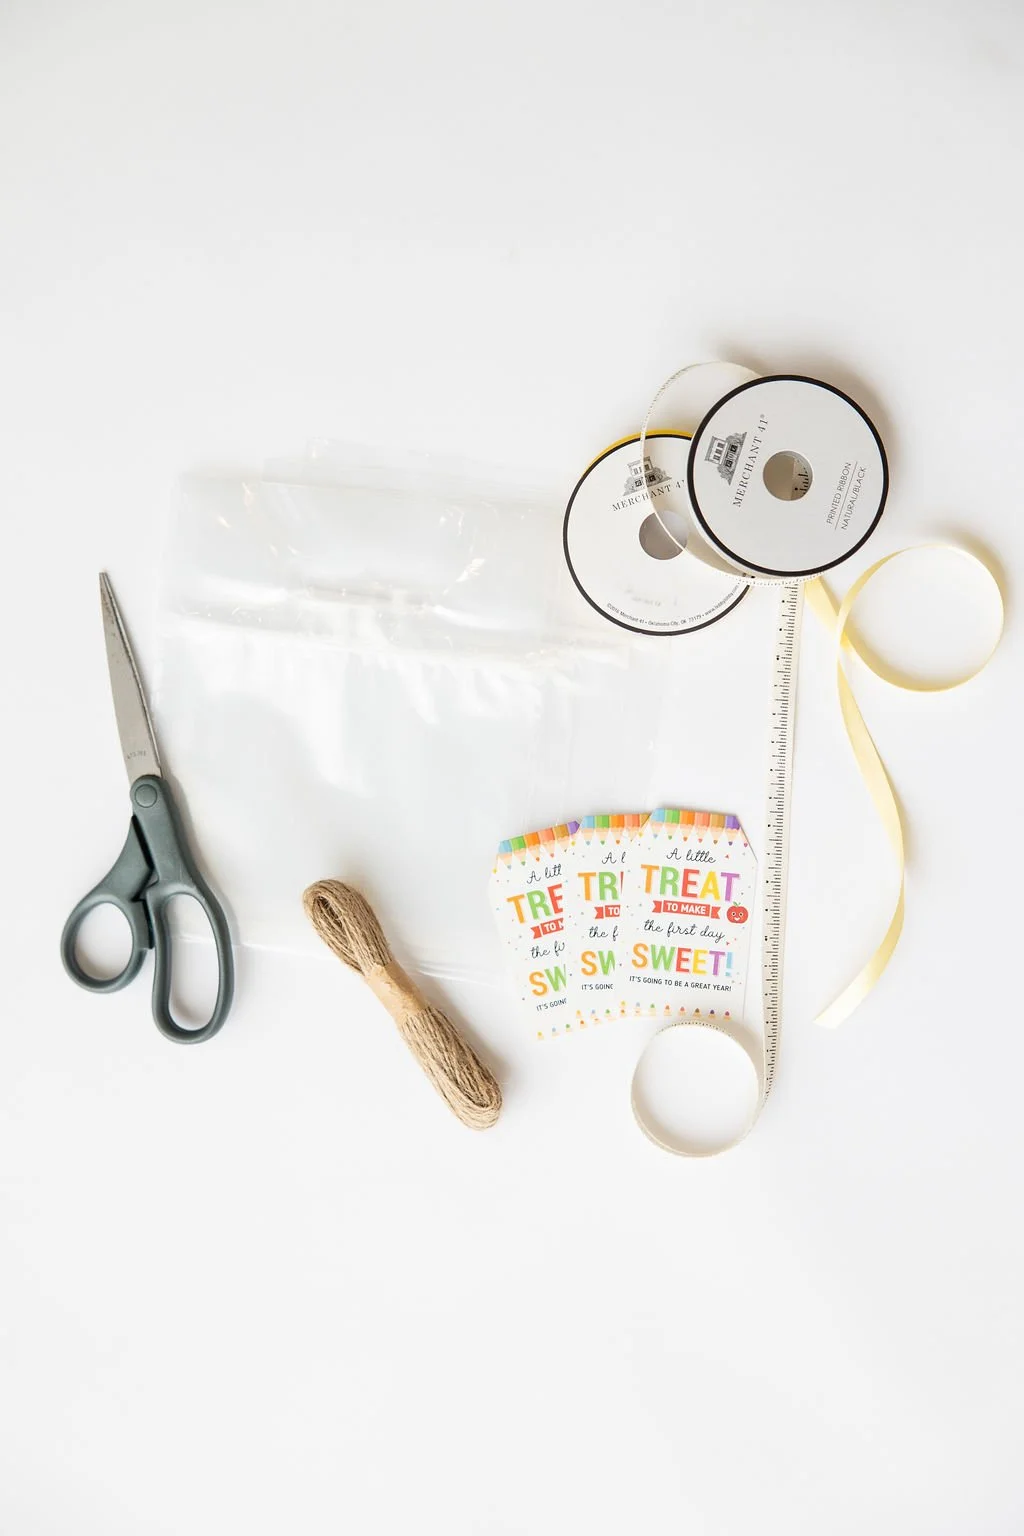
First, Gather your supplies.
Making sure you have all your supplies before you get started is the most important step.
For my treat bags, I grabbed a box of cookies from Costco that had marshmallows in them instead of chocolate chips for this project. (I tend to stay away from chocolate in late summer months so it doesn’t melt and get everywhere). You are welcome to add anything you want for yours.
List of items:
Goodies to go inside your bag. Plan for each child coming to your sessions.
Scissors
Twine
Decorative Ribbon
Clear bags large enough for your goodies
Decorative Tag
Putting the Treat Bags Together
First, we put the goodies in the bag and make sure its zipped nice and tight. I prefer the baggies that have a zipper tops so kids can spill the contents.
Second, we want to cut about 4 inches of twine to attach the “sweet treat” tag. This tag can be bought on our amazon list here
Third, we are going to attach the tag with the twine on our goodie bag through the handle like shown below.
Fourth, once the twine is tied, we cut off any extra twine beyond the knot we made. It should be comfortably tied like the top right image below.
Fifth, we are going to cut about 8-12 inches of your decorative ribbon. 8 inches if you are going to make a cute tied knot, 12 inches if you would prefer it to be a bow. I also recommend using fabric scissors to make the cleanest cut with your ribbon. I stacked a layered yellow ribbon and decorative ribbon that looked like a ruler.
Lastly, bring your ribbon through the hole at the top of your decorative tag. You will then make it a bow or knot for a pretty finish! The last two images in the gallery below show you a bow vs knot option.


Your finished treat bag!
Creating moments of connection doesn’t have to be complicated—or expensive. These back-to-school treat bags are a small gesture with big heart, reminding your clients why they love working with you (besides your killer photo skills, of course). So go ahead, grab the goodies, print the tags, and make something sweet that sets you apart. Because in a world full of inboxes and invoices, a little surprise-and-delight goes a long way.